What this rig is all about:
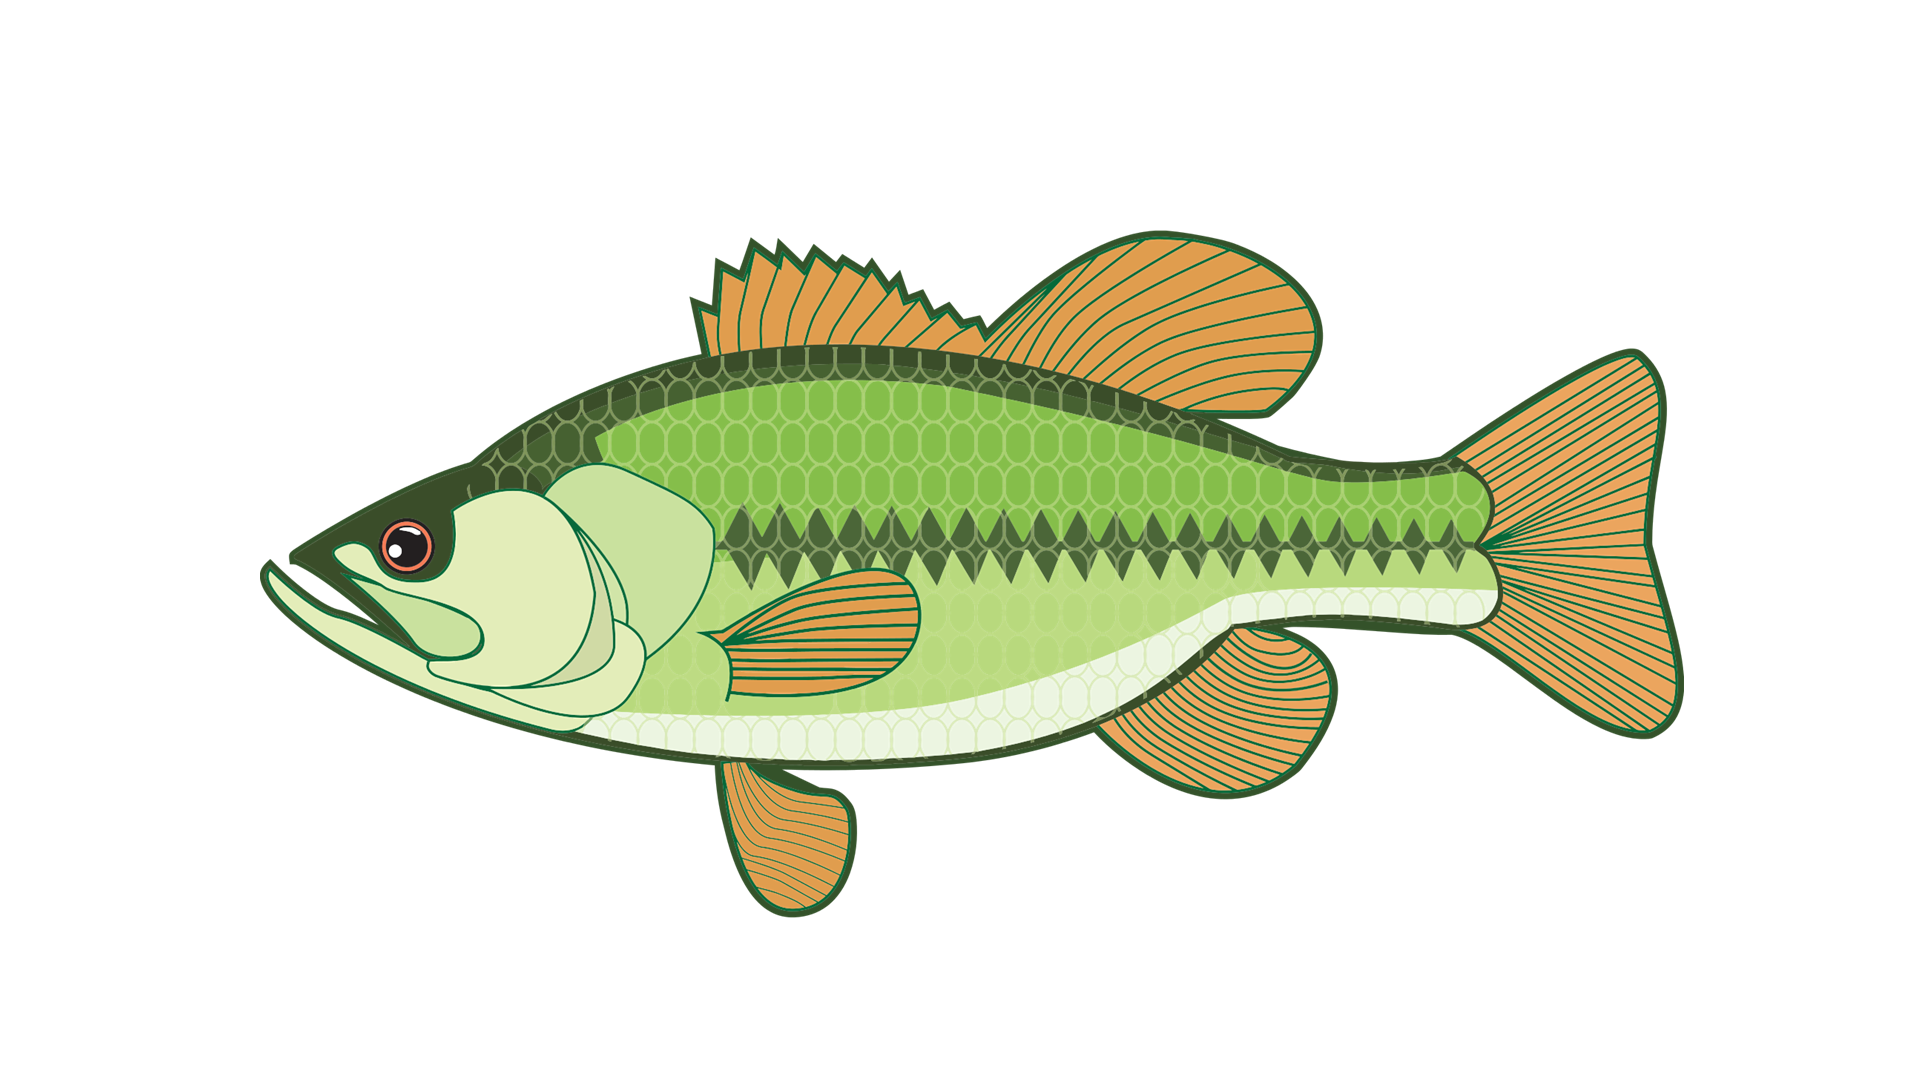
If you don’t have any dead herring or squid ready, swim baits are the best option to target medium to large lingcod in California and the Pacific Northwest. Read on to learn about a great and convenient setup that will maximize your chances of landing a lingcod.
Here is a list of materials/items that you will need to make this rig:
Links include pricing info on Amazon and are the suggested products for this rig.
- 30 pound braid for the main line
- 20-30 pound monofilament line for leader
- Barrel swivel
- Snap swivel
- 4-6 oz jig head
- 4-6 inch swim bait
Recommended rod:
SHIMANO Trevala 6’6 MH Saltwater Jigging Casting Rod (7 foot medium heavy rod)
How to use this rig:
In my opinion a large, plastic swim bait is the most consistent bait to catch a medium to large lingcod. They present a really nice, natural presentation to the fish. The bigger lingcod stay in and near structure and don’t exert a lot of energy. It takes life-like movement, kind of fluttering right above their head to trigger a bite.
If they’re feeding, they’re going to hit it but if they’re in place in spawning mode they might not be attracted so anything natural like a swim bait may maximize the chance of a bite.
As far as working the swim bait with your rod, you’ll need to jig it near the bottom of the water. Drop the bait all the way to the bottom to structure or rocks (but not sand), reel it up just slightly. Jig up and down at a pace of roughly 1-2 seconds vertically. If you’re fishing from the rocks or a cliff, you can do the same thing if you’re fishing in a hole or you can cast it out and reel in, let it flutter and drop, reel it in again, and repeat.
Swim baits are also best for fast drifts, the hook won’t snag the bottom as easily, and the drift speed creates natural action.
The recommendation is to use 5-7 inch length swim baits with jig heads anywhere between 4-6 ounces. Keep a bunch on you in case you get snagged, so keep 5 or 6 on you all with different colors.
As for the color, you may want to experiment with this. Sometimes contrasting colors work (like red and white, kind of a candy cane type swim bait) and sometimes darker, blended color with some glitter works as well. All fishermen have different opinions on what color works the best.
As far as conditions, this rig will work well for little to moderate swell. With larger swells, you will need heavier jig heads and/or even add heavy sinkers. This rig is also good for fishing off the rocks or on a boat and kayak.
The reason for the braided line is if your bait is down hundreds of feet, and you’re working the bait, you want to be able to feel any bites and if you have monofilament on the main line, it is subject to stretching and it’ll be more difficult to feel the bite. With braided line, you get a lot less of that stretching which will allow you to feel the bites much easier.
The monofilament leader is also used in case you get snagged so that the leader can break off and not the main line.
Setup guide:
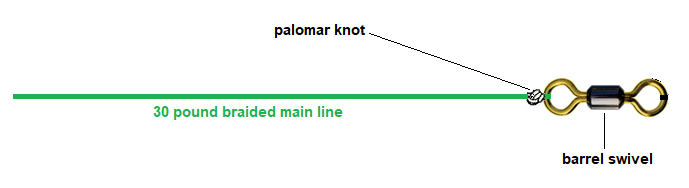
- The first step is to attach your barrel swivel to the braided main line. I would recommend a palomar knot. Check out this video for a palomar knot tutorial. However, any secure knot will do.
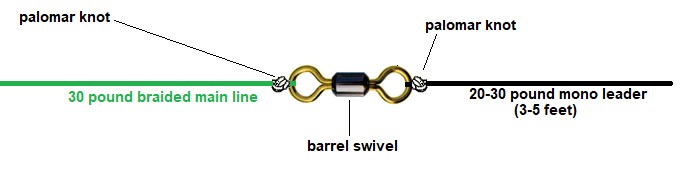
- Tie the leader line (3-5 feet) of 20-30 pound monofilament onto the other end of the barrel swivel.
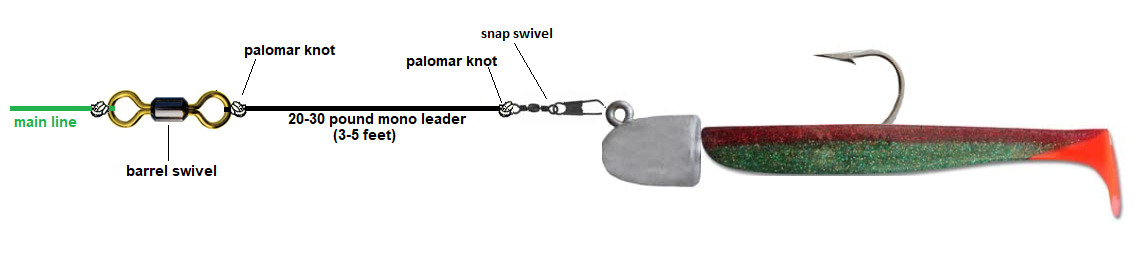
- Tie a snap swivel onto the end of the leader line. This allows you to quickly switch between swim baits if you need to.

- Rig the swim bait onto your jig head like so:
It’s important to rig it correctly without any crimps so that the action in the water is natural.
And there you have it, the finished rig looks like this:
It’s a relatively simple rig but it works great! Go out there and test it out! Let me know if this rig is working for you and rate it at the top of this article.