What this rig is all about:
Rockfish are a species of fish that are prized for their white meat that is full of protein and an excellent source of vitamin D and potassium. Most rigging setups used to catch rockfish are just dropped down vertically from a boat or a kayak. The specific rock fishing tackle setup in this article is meant for keeper sized rockfish and larger. Read on for a step-by-step guide on how to make this dropper loop rig and some tips on how to use it.
Here is a list of materials/items that you will need to make this rig:
Links include pricing info on Amazon and are the suggested products for this rig.
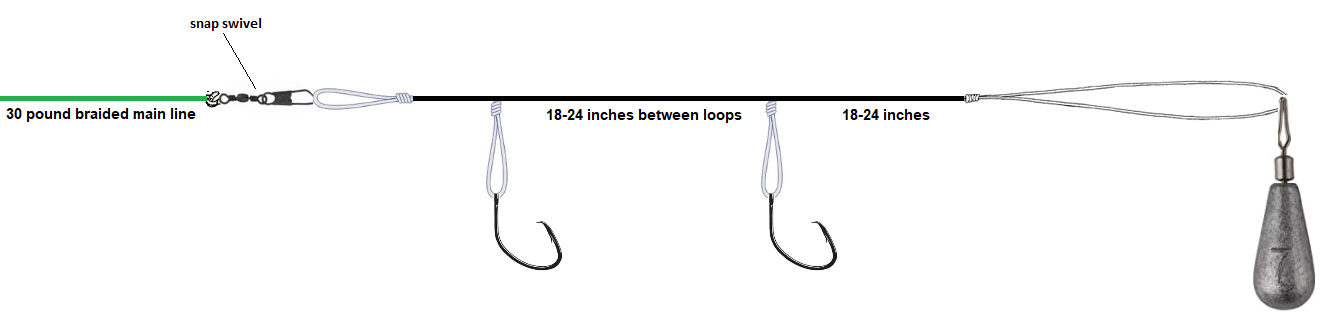
- 30 pound braided main line
- 25-30 pound monofilament leader line
- Gamakatsu Octopus NS Black Hook Size 1/0 25 Per Pack
- 4-16 ounce sinker (depending on water conditions)
- Snap swivel
Recommended rod and reel:
- Daiwa Saltist Levelwind Conventional High Speed Reel, 4 (4 CRBB) + 1, 6.1 : 1 – STTLW30HA
- Phenix Black Diamond Inshore Series Rods (7’6″ Med)
How to use this rig (bait, weight, and action):
The bait used to hook on can be separated into 2 categories: organic or artificial.
For the organic stuff, you can use live bait like sardine. Or you can use cut bait like mackerel and anchovy. Squid can work as well. But how the fish are biting for the day really depends and you will have to experiment a bit. It is more of an art than a science.
For the artificial baits, you can feed onto the hooks artificial grubs or use a shrimp fly rig or a Berkley gulp or a swimbait on a jig. You can enhance the artificial baits by tipping the hook with some squid just to entice the rockfish a bit more. With the artificial baits, you may want to work the bait up and down to create some action for the fish. Here are some links to some artificial baits you can try out:


When fishing for rockfish in deeper waters, it is necessary to select a weight that will work for the depth that you’re fishing in. Generally, the deeper the water, the larger the weight you should use. A 4 ounce sinker is generally adequate for 50-75 feet of water. If you get passed 100 ft, you’ll likely need to up that to anywhere from 6 to 12 to even 16 ounces. The current is also a factor where the faster the current, the larger your sinker should be.
Drop your rig to the bottom and reel it up just a little bit and then work the bait in the water column up and down. You may want to play with how far off the bottom the rig is for the best results. Don’t forget to set the hook once you think you have a bite.
Setup guide:
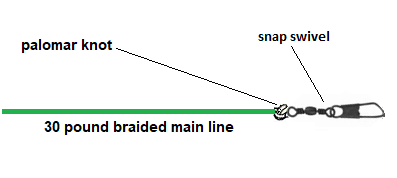
- Tie your 30 pound braid main line to the snap swivel You can use any knot that makes a secure attachment but I recommend a palomar knot.
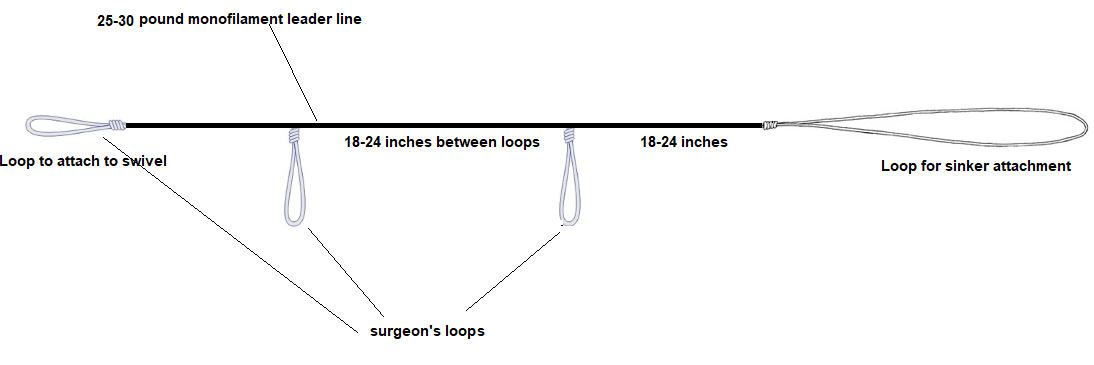
- Now, let’s rig up the leader. All the loops on this leader setup are surgeon’s loops and you’re going to tie 4 surgeon’s loops (1 to attach to the snap swivel, 2 for the dropper loops and hooks, and the last one for the sinker weight). You don’t need to cut the leader line ahead of time. You can just tie the leader rig from the spool. Check out this video for tying a surgeon’s loop:
Unravel some leader line from the spool and tie the first loop for the swivel attachment. After that, let out some more line and tie the next loop. When you’re tying the subsequent loops, leave about 18-24 inches between each loop.
On the final loop for the sinker, you want the loop to be extra big as to leave some length for the sinker. See the following picture for a guide.
- At this point, you don’t need to tie anymore knots. Now it’s time to put on the hooks. Feed each surgeon’s loop through the eye of a hook and then wrap the loop around the hook to attach it.

As an option for more modularity, you can first attach some snap swivels onto the surgeon’s loops for switching out hooks and/or artificial bait rigs.
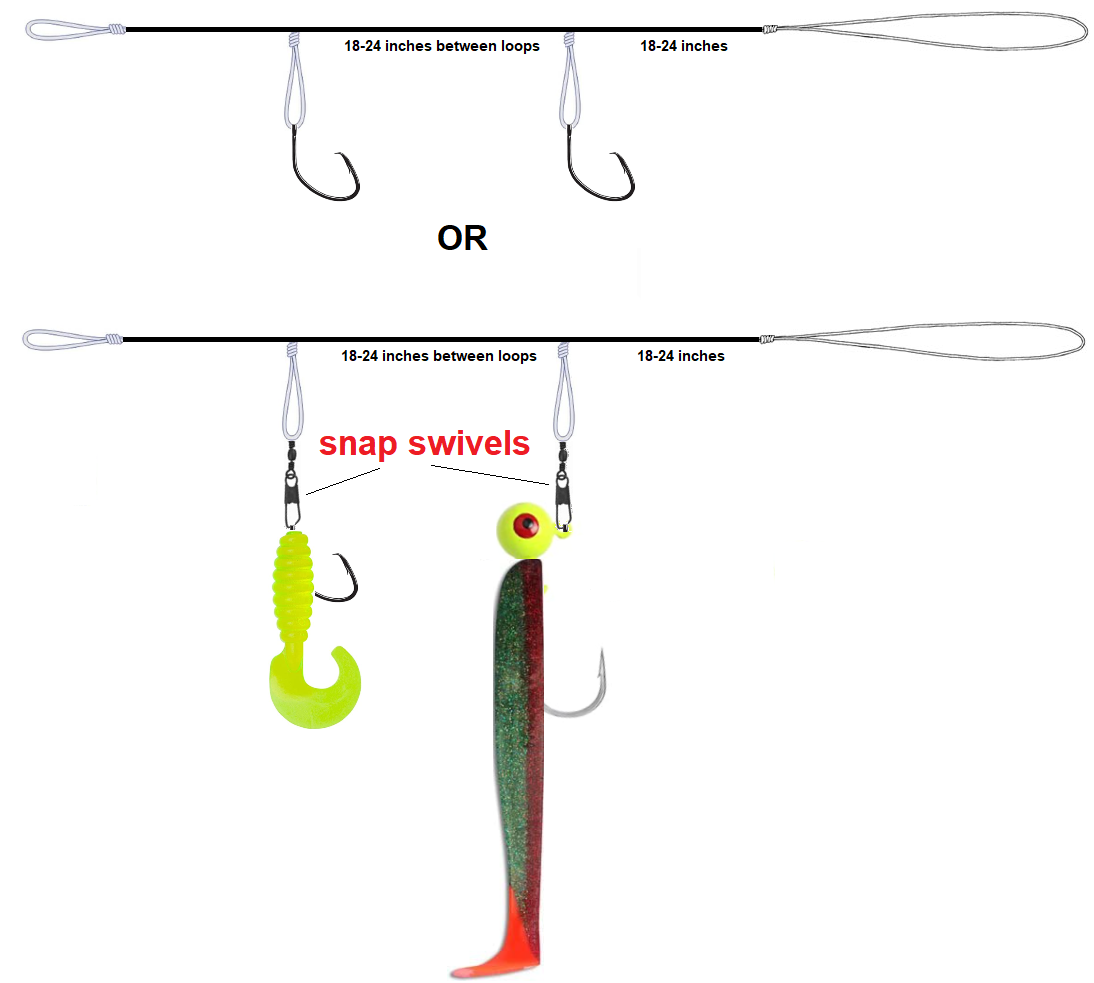
- Finally, attach the sinker the same way you attached the hooks and snap the open loop onto the snap swivel. The finished rig should look like this.
There’s a little bit of setup involved but this rig works very well! Go out there and test it out! Let me know if this rig is working for you and rate it at the top of this article.